Showing posts with label Silva Hayes. Show all posts

Wednesday, May 13, 2015

My favorite piece of painted furniture

I am busy working on mosaic and decoupage pieces and will post pictures soon --
this is one of my favorites from the past - a piece of painted furniture.


(the drawer)

Thursday, July 24, 2014

Florida Butterflies 2, 3, and 4, ready to fly


Largest one is 8" across.  All stained glass, on mesh, for a public art display in Fort Myers, Florida, to be installed by Eve Lynch of Kraken Mosaics.  All the butterflies will be grouted with black!  

Tuesday, May 27, 2014

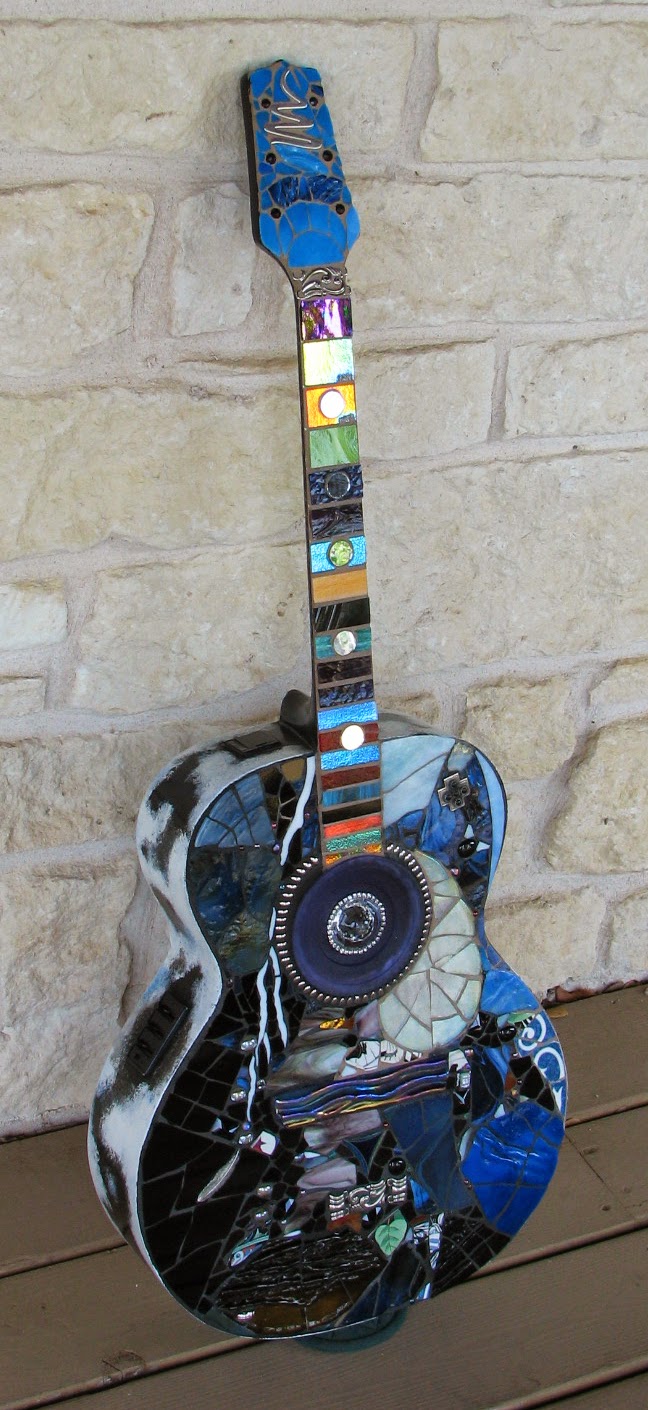
Darcy's 3rd Guitar Done


Guitar shape cut from Wediboard.  Features:  Blue glass bead "tuners," Texas longhorn, sterling silver Lone Star, purple and black stained glass, silver metal and mirror fretboard and neck, iridized blue stained glass, custom fused glass triangle by Cathy, bronze sun, dichroic glass and silver bridge, iridized black glass paw print, sterling silver "lasso," and cobalt blue stained glass spiral.  

Wednesday, May 7, 2014

Tuesday, March 12, 2013

Out of This World - Framed

Aaron Brothers on Brodie Lane in Austin did a wonderful job framing these.  I'm so pleased.  Thank you, Justin at Aaron Brothers!

18" x 24" Mars Outer Space Mosaic

18" x 24" Black Hole Space Mosaic
 24" x 48" Cow Jumped Over the Moon
Stained Glass Mosaic

Installed side by side they are 7 feet wide.  

Saturday, February 23, 2013


Dave Mason (Rock and Roll Hall of Fame, founder of the rock band Traffic)
outside South Austin Music store, 2013

Friday, May 27, 2011

Space mosaic work in progress

Here are pieces I've finished so far, little vignettes that will be used as filler around the planets and the large comets. (Click on the picture to enlarge, and then click again to enlarge further.)

These are done on mesh (netting), the largest ones being approximately 12 inches by 12 inches. This technique will save me hours of work; it's a simple matter to glue the mesh piece to the cow and the piece will conform to the cow's curves. I order this mesh from Wit's End Mosaics and apply the tess to the mesh with MAC glue. I wrote a how-to article about this method: http://hubpages.com/hub/How-to-mosaic-on-mesh


Sunday, May 22, 2011

Glass Tumbling for mosaic project

Today I began tumbling glass for the big outer space mosaic project. I have cut round shapes for planets and ground the edges smooth. I nipped bits of glass and 24K plate rims using Leponitt glass nippers. I loaded one barrel and tumbled the glass for 35 minutes. It came out great, shiny with smooth edges. I was concerned about the iridescent glass and the 24K gold-plated porcelain but it was fine. This first load was a test. I loaded up another barrel and started it, noting the time. I got busy with supper and granddaughters, etc., and suddenly realized that the tumbler had been going for almost an hour. I dropped everything and ran out to rescue the glass. It was still in good shape; the iridescence was still there and so was the gold.

These pieces will be used to mosaic galaxies and nebulas and comet tails. I decided today that I will write a Hubpage giving detailed instructions on how to tumble stained glass. When I publish it, I will come back here and post the link. I am having a great time, putting together all the tess for this large and wonderful project!

Still haven't heard from the CowParade, but if my design is not selected, I will use all these pieces in a large wall hanging with the same theme. So either way, I am anxious to get started!

Saturday, March 6, 2010

Bought supplies today!

Went to Helios Glass today and bought: black Bullseye glass, thin glue, glass powders (metallic copper, olive green, and lime green), thinfire kiln shelf paper, fiber paper, and some dichroic stringers for my next mosaic guitar. I am going to try the ''fossil vitra'' tutorial posted by Paul on the Helios Glass website, and try making some cool tiles with a black background and shapes of real leaves. I learned from Karen that I should not stack shelves in the kiln; that I should just stick with one, and that the thermocouple should be in position above the shelf (I had it positioned below), and that one should always paint the kiln floor and the shelf with kiln wash, even if one is planning to always use the thinfire kiln shelf paper. Next time I want to buy enamel paint but held off on that today. Now all I need is some cheap hair spray and I will be ready to make my leaf fossil tiles!!!